How to deploy a Hexo static site
Deploy a Hexo static site to your server with Launchdeck
Hexo is a fast, simple & powerful blog framework. In this article I'll explain, step-by-step, how you can easily deploy your Hexo static site from your Git repository to your server with the push of a button.
To generate a production build of your Hexo project you'll have to run several build commands. If you don't have the option to run it on your server, such as with shared hosting via FTP, Launchdeck offers you the necessary tools to do this on our infrastructure within a safe and performant isolated build container.
You may have solved this by running the build commands locally at this point before uploading the resulting files to your server. Because this is a manual process, it’s far more time-consuming compared to an automated process such as the one Launchdeck offers. In addition, dependencies such as node_modules must be installed locally,
and when you work in a team (or with branches), you'll know the pain of tracking generated assets / bundles in version control.
Launchdeck is designed to manage the entire deployment process, from fetching changes from your Git repository, running commands, and uploading the changed files to the server, in one automated workflow.
Our basic plan is free, includes all features, and allows you to deploy your project as often as you'd like! Let's automate the deployment process for your Hexo projects.
Create a project
If you haven’t already created a Launchdeck account, you’ll need to sign up for a new account.
Let’s get started by creating a new project and linking it to your Git account. All repositories within your account will be retrieved and shown as a list, from which you can now select the one you’d wish to use. When creating the new project, Launchdeck will automatically add a webhook to your repository so that when you push new commits, they'll show up in Launchdeck automatically.
You can connect to a repository on any of the main hosting providers - Bitbucket, GitHub, GitLab, or - if you host a repository elsewhere - you can configure it manually.

Add build script
If you’re using the Hexo CLI, you’ll need to edit your package.json to add a build script:
...
{
  "scripts": {
    "build": "deploy hexo"
  }
}
...
Commit and push it to your repository before moving onto the next step.
Configure build commands
The next step allows us to define commands which will be executed in an isolated docker container - this is the build step. Hit the button “Auto suggest build automation” and we will automatically suggest a build config based on the contents of your repository.
If you’re using the Hexo CLI you’ll only need to add the following build commands. Please note that the input and output paths are specified as well. This will be used to cache the node_modules folder and circumvent the time-consuming task of having to install the dependencies from scratch with every deployment.
This will save you a ton of time!
build:
  - cmd: npm install
    input: package.json
    output: node_modules
  - npm run build
All files generated using these build commands will be uploaded to the server. If you use the Hexo CLI you'll want to deploy just the browser bundle which is generated inside the public directory. To "pull" everything inside this folder up to the working directory and delete everything else, use:
pull-up public
You’ll find more information on how to set up and use build commands on our docs page about build automation.
Configure a server
Now let’s tell Launchdeck where to upload your Hexo static site.
Hit ‘+ new server’, select the protocol, and enter the credentials facilitating access to your server.
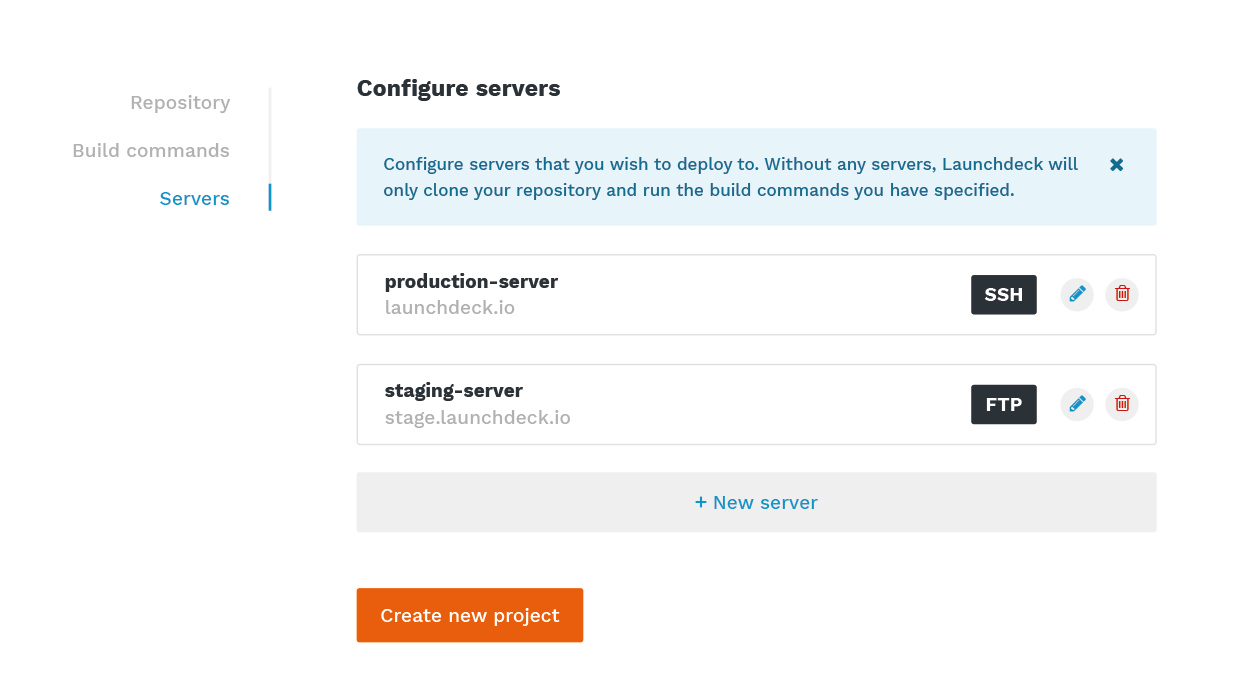
All the ins and outs on how to set up a server can be found below in our server setup docs;
Deploy for the first time
We’re now ready to start our first deployment. Click ‘create new project’ to confirm the settings and add the project. In the project overview, you can now start the build. The code will be cloned from your repository and prepared for you to publish it. Hit ‘Publish’ and your Hexo project is live!
If we then commit changes to our repository, the commit will automatically appear in your project overview where you’ll be able to upload and publish your new version with the push of a button. If anything goes wrong, you can simply roll back to the latest working version.
That’s all! By using Launchdeck to deploy your Hexo static site, you’ll never have to upload files or run commands manually. Just hit “publish”, and Launchdeck will deploy your website.